In today’s highly unpredictable world, having an emergency light that you can rely on during power outages is increasingly important. Whether it’s for safety during natural disasters or simply to navigate your home in the dark, being prepared is essential. This article will guide you through the process of creating your very own emergency light using a 5-watt LED bulb, ensuring you have a reliable source of light when you need it most. We will explore the concept of ‘emergency fund kaise banaye’ through this process, revealing how you can create a valuable asset for your home.
Understanding the Basics of Emergency Fund Kaise Banaye
Before embarking on the journey to create an emergency light, it’s vital to understand why an emergency light is crucial for your home. An emergency light serves multiple functions: it provides safety, comfort, and peace of mind. Particularly during a power outage, it can illuminate pathways and prevent accidents. But how do we create an emergency light from scratch? This process embodies the spirit of ‘emergency fund kaise banaye’—turning simple materials into a valuable tool.
Materials Required for Your LED Emergency Light
To build your LED emergency light, gather the following materials:
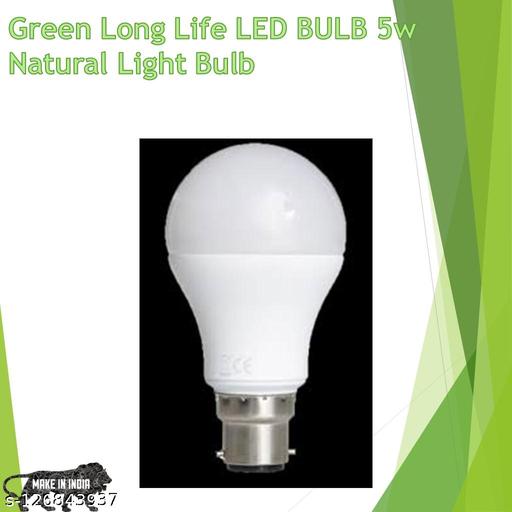
- 5-watt LED bulbs (a pack of 10 can be useful)
- Battery holder compatible with your chosen batteries
- Rechargeable batteries (preferably lithium-ion for durability)
- Wires (preferably copper for better conductivity)
- A switch to control the light
- A small enclosure or casing for safety
Having these materials ready will set you up for success in creating your emergency light. The focus on ‘emergency fund kaise banaye’ encourages us to maximize resources we might already have on hand, ensuring cost efficiency in our project.
Preparing the LED Bulb for Use
The first step in your project is preparing the LED bulb for integration into your emergency light system. LED bulbs are energy-efficient and long-lasting, making them the ideal choice for this purpose. To begin:
- Take your 5-watt LED bulb and ensure it is in good condition.
- Remove any casing if necessary, ensuring you have access to the connections.
- Once accessed, strip the ends of your wires to prepare them for soldering.
Safety note: Always handle electrical components with care and ensure your workspace is dry and free from clutter.
Wiring Your Emergency Light
Now that your LED bulb is prepared, it’s time to connect the wiring. The concept of ‘emergency fund kaise banaye’ encapsulates this part of the process, where we effectively utilize simple wiring to create something robust and functional.
Follow these steps to wire your emergency light:
- Connect one wire to the positive terminal of the LED bulb.
- Connect another wire to the negative terminal of the LED bulb.
- Attach the free end of the positive wire to the positive terminal of your battery holder.
- Connect the negative wire to the switch, and the other side of the switch to the negative terminal of the battery holder.
This wiring setup allows you to control the bulb with the switch while ensuring it can be powered by your batteries.
Ensure Adequate Power Supply
An excellent emergency light is only as good as its power supply. Ensuring that you use reliable rechargeable batteries can provide a significant sustainability factor. Here’s how you can select the right batteries:
- Choose batteries with a capacity that matches or exceeds the power needs of your 5-watt LED bulb.
- Ensure they are rechargeable to reduce future costs.
This ties back to the idea of ‘emergency fund kaise banaye’. By investing in high-quality rechargeable batteries, you enhance the longevity and reliability of your emergency light.
Creating an Enclosure for Safety
Once you have completed the wiring and your bulb is functioning, the next step is to create a safe enclosure. It is crucial to ensure that your emergency light is not only functional but also safe to use. Here’s a brief guide on how to construct an effective casing:
- Consider using a small plastic or metal box that can safely house your LED bulb and wiring.
- Ensure that there are ventilation holes to prevent overheating.
- Make sure your enclosure is sturdy enough to protect the components from physical damage.
A well-made enclosure reflects a thoughtful approach encapsulated in the mantra of ‘emergency fund kaise banaye’. The idea emphasizes creating sustainable solutions that serve multiple purposes—functionality and safety being paramount.
Testing Your Emergency Light
Once your emergency light is assembled and housed in a secure enclosure, it is time to test the functionality of your creation. Follow these steps:
- Make sure your batteries are charged.
- Turn on the switch to see if the LED bulb lights up.
- Double-check for any loose connections if it does not turn on.
This testing phase is the final step in your DIY project, ensuring that you have a reliable source of light during emergencies. Successfully creating an emergency light is indicative of how we can efficiently implement the ethos of ‘emergency fund kaise banaye’ in our everyday lives, turning simple components into a foundational asset.
Maintaining Your Emergency Light
Once your emergency light is complete, regular maintenance can extend its life and functionality. Here’s what you should do:
- Regularly check the battery charge and ensure it is fully charged.
- Inspect all connections for any corrosion or wear.
- Test the light every few months to ensure it works properly when needed.
Implementing a good maintenance routine not only helps keep your emergency light operational but also assures you that you are prepared for unforeseen events. This proactive approach further embodies the philosophy of ‘emergency fund kaise banaye’—staying ready for anything life throws your way.
Conclusion: The Value of Being Prepared
In conclusion, creating an LED emergency light using a 5-watt bulb can be a rewarding and practical project. By embracing the principles of ‘emergency fund kaise banaye’, you make a proactive choice to ensure safety and preparedness in your home. Not only does this process teach valuable DIY skills, but it also deepens your understanding of energy efficiency and emergency readiness.
When you invest time into making your emergency light, you are contributing to your family’s safety, comfort, and peace of mind during power outages or emergencies. By following our guidelines, you are not only saving money but also enhancing your ability to respond to unexpected situations responsibly.
Your Emergency Light: A Testament to Resourcefulness
Building an emergency light represents more than just a handy tool; it showcases your resourcefulness and determination to ensure safety for yourself and your loved ones. Remember, being prepared can make all the difference during a crisis, and knowledge is your power. Start implementing these ideas today and take the first step toward comprehensive preparedness with your new emergency light!
Learn More About Battery Functionality
By educating yourself and committing to DIY solutions, you embody the essence of ‘emergency fund kaise banaye’ and transform challenges into opportunities for growth and safety.